How to Create Your Own Custom Views in Microsoft Outlook 

Morgan Little - Systems Administrator

by Morgan Little
December 2018

<

Microsoft Office Outlook is an essential business tool that you may find yourself continuously using throughout your day. Have you ever had the feeling that the text size is getting smaller and smaller in the Outlook window? Every wondered if you could change the way the coloring, font and views are displayed. Great news… in this edition of the Scylla Tips and Tricks, we will go over how to make custom Outlook views.

First, it’s important to know that Outlook calls the way it displays all the menus and options as Views. You have the option of customizing views and applying them to everything in Outlook (Inbox, Deleted Items, etc) or to particular folders. Outlook views include options for text size, colors, and fonts for the layout of your content.

To start, we recommend saving your current view to allow the option of going back to this view if the new view you create isn’t ideal. Here is how you do this:

Save Current View

  1. While Outlook is open, select the folder you would like to create the view for (like the Inbox), go to the View tab, in the Current View group, choose Change View > Save Current View as new view.
  2. In the Copy View window, enter a name to identify it as the first or original view and select ok.
  3. You should now see this view name as an option under Change View Group.

Now it is time to start customizing Outlook by creating a new view. Here are the steps on how to do this:

Create a new View:

  1. While Outlook is open, select the folder you would like to create the view for (like the Inbox), go to the View tab, in the Current View group, choose Change View > Manage Views.
  2. In the Manage All Views dialog box, choose New.
  3. In the Create a New View dialog box, enter a name for your new view, choose the type of view (default is table) and then select “can be used on” based off of which folder you would like to apply the changes too (recommend All Mail and Post Folders).
  4. In the Advanced View Settings: New View dialog box, choose the options that you want to use, and then choose OK.
    1. To change the text sizing, choose “Other Settings”. In the new window you can change the Column Font, Row Font and Message preview font to your preferred sizing and style. Select OK, to close the window.
    2. To change the Columns displayed in the layout, select “Columns” and go through the Available Columns to add them to the view. You can also remove columns from the “Show these columns in this order” view as well as using the move up or move down button will change the order.
    3. To change the font style for different message types (Unread, Overdue, and Expired Email), choose the Conditional Formatting button and choose the item you would like to change then the font button to customize the settings.
  5. To use the view immediately, choose Apply View.

What if the new view isn’t working our for you? You can easily go back and to the original default view through the following steps.

Restore Default Views

  1. While Outlook is open, select the folder you would like to create the view for (like the Inbox), go to the View tab, in the Current View group, choose Change View > select the name of the first/original view you created.
  2. Once this view is applied to the current folder, you apply the view to additional folders by going back to the View tab, in the Current View group, choose Change View > Apply View to other folders.
  3. In the Apply View window, select the different folders (highlighted in blue). This also gives you the option of applying the view to subfolders to help make the process go faster (highlighted in red).

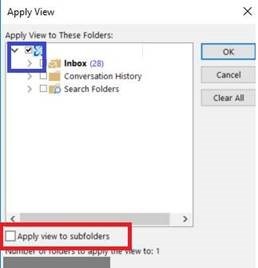
4. Select ok to apply the settings.


In conclusion, we hope you enjoy having the knowledge on how to use this is a great way to customize your Outlook window.

Related Articles